Yoga is fun to do and, at the same time, offers several benefits. It is something that you can begin with right now and is completely free. Among the several benefits of yoga, ease back pain is the most effective. If you are suffering from back pain, yoga may be the best treatment. It is a mind-body therapy that relieves back pain and the stress that accompanies it.
So, here are some techniques of yoga for back pain relief.
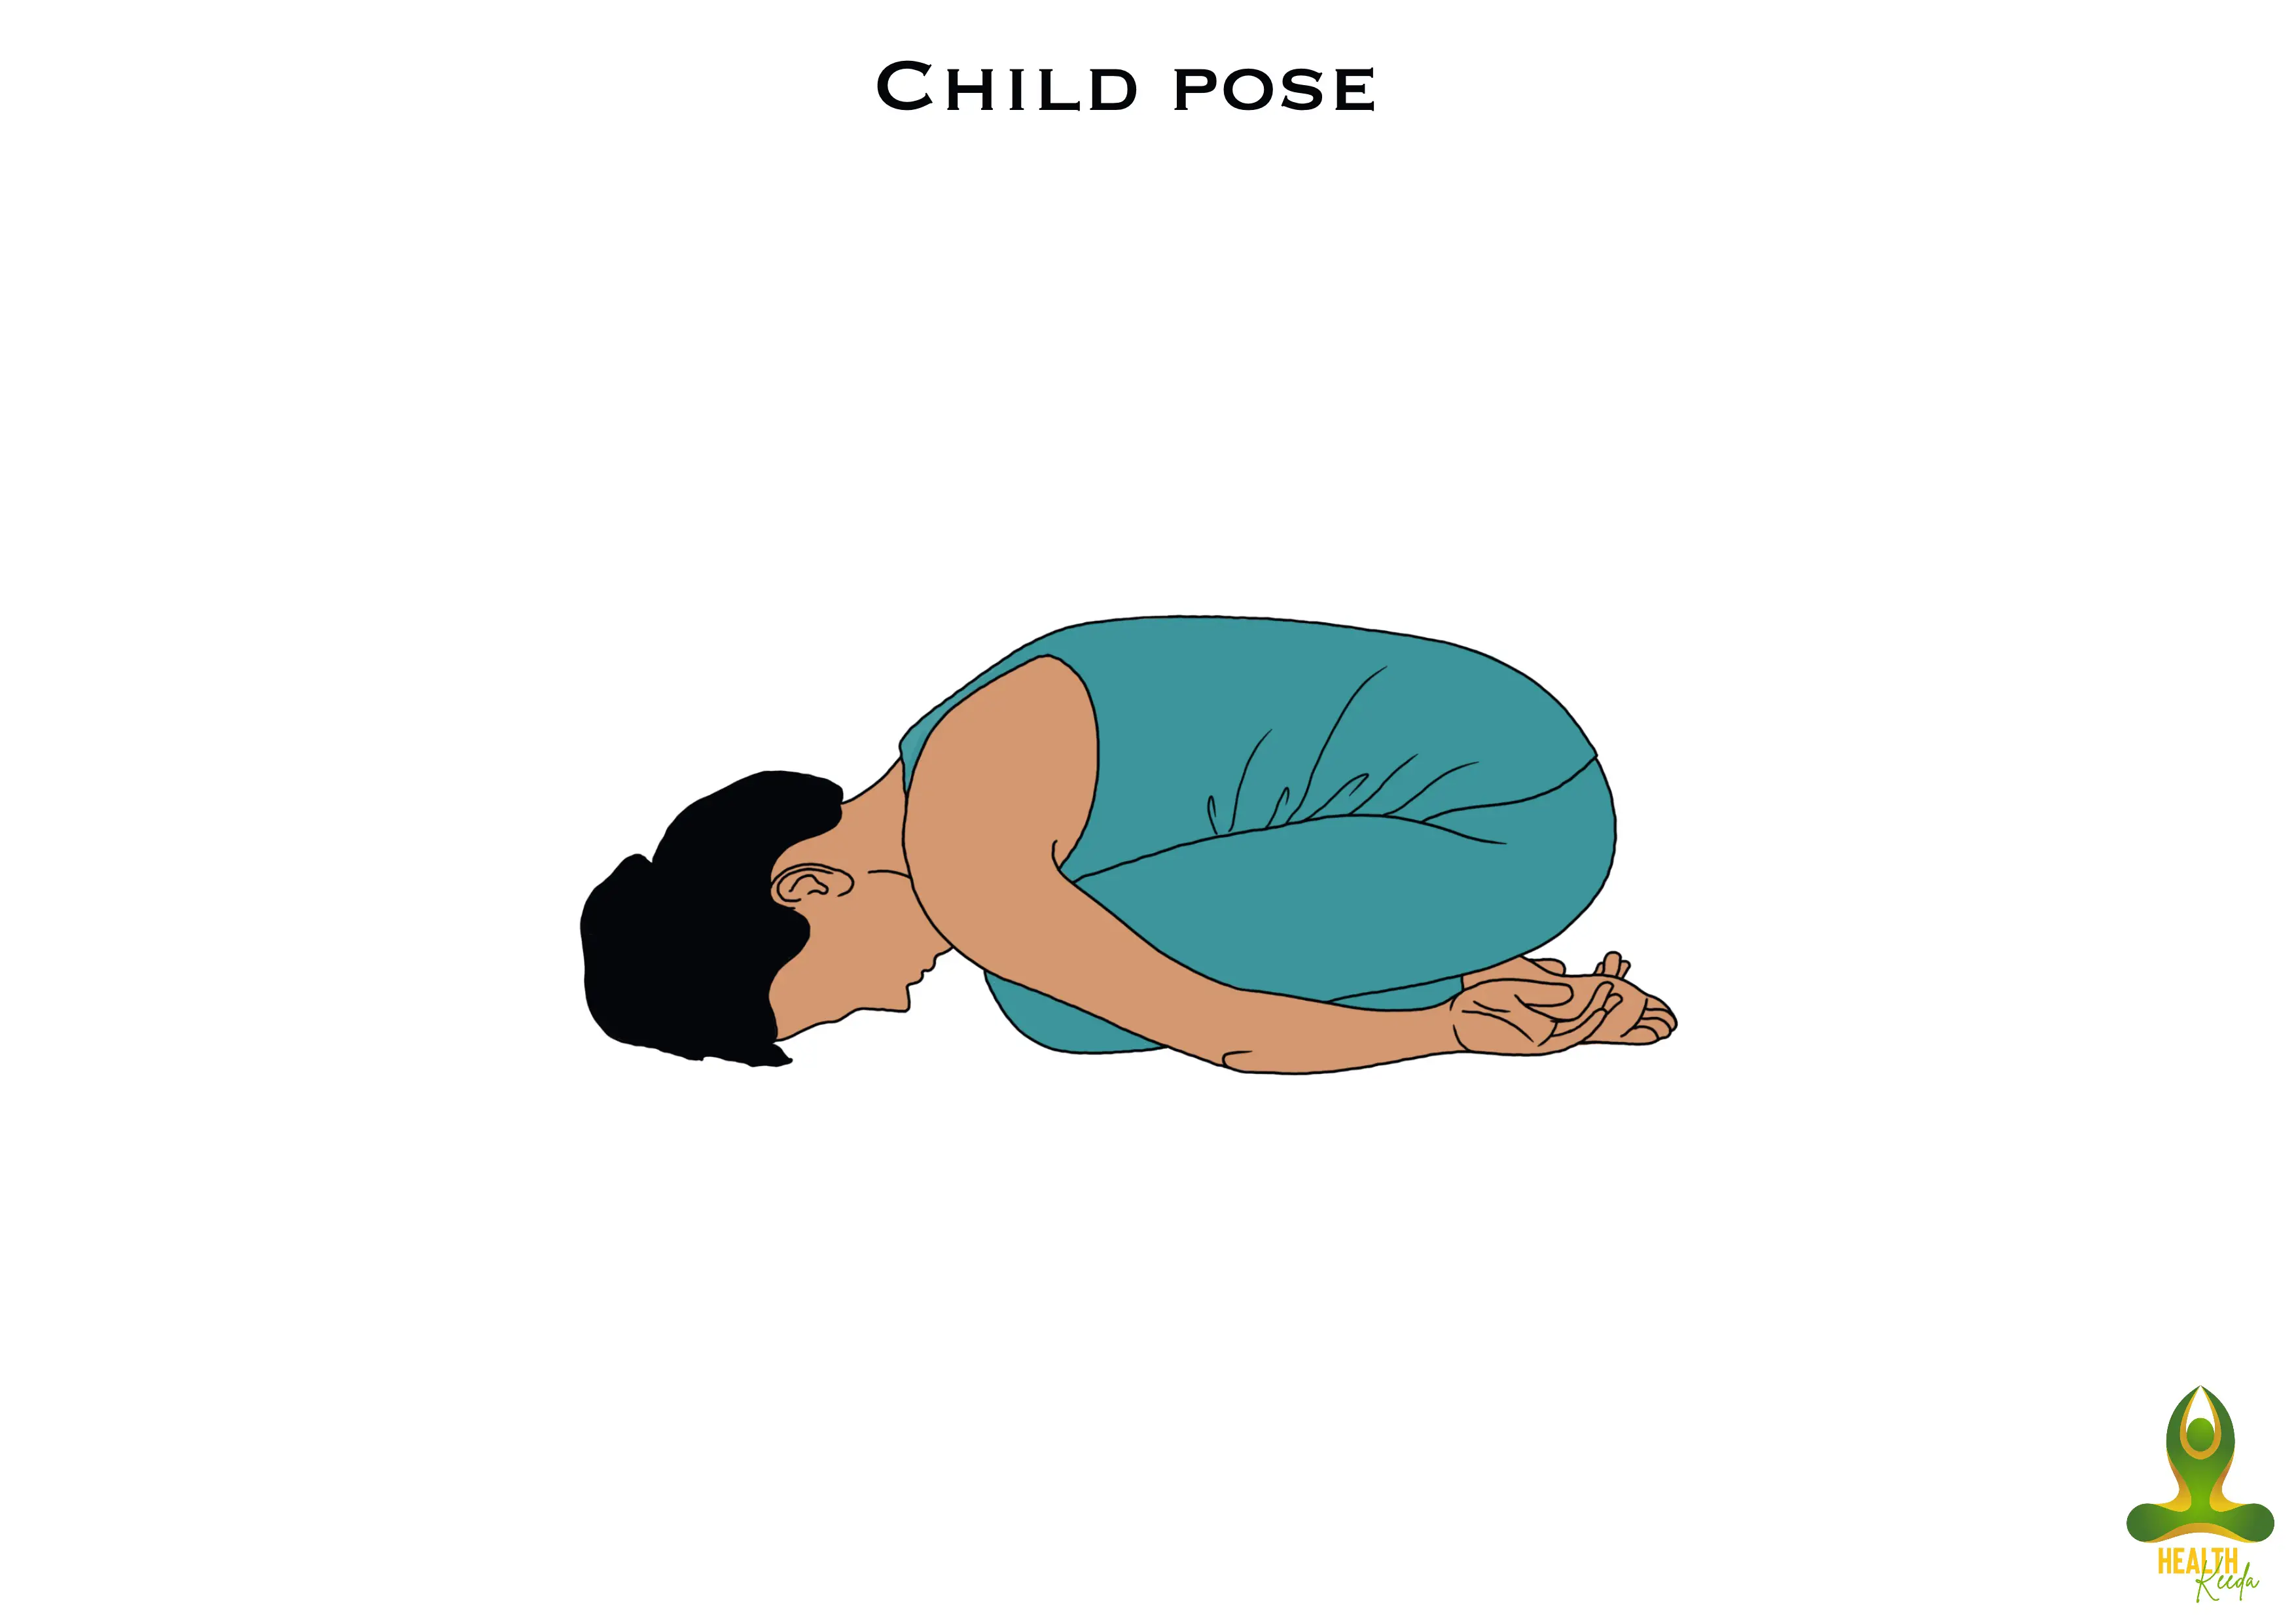
- Balasana or Child’s Pose
Balasana is the perfect yoga for back pain during periods as it relaxes and releases the tension in your neck and back. Here, your spine is lengthened along with the stretching of your hips and thighs. Practicing this pose can help in relieving stress and fatigue.
Steps:
- Fold your legs and sit down on your heels with your knees together.
- Start bending forward with your hands in front of you.
- Touch your forehead to the ground and keep stretching your arms in the front.
- The arms can also be placed sideways with palms facing up.
- Focus on releasing tension in your back and hold the pose for 5 minutes.
- Now, come back and relax.
- Cat Stretch
Cat stretch is an excellent yoga workout for stretching your back. It is known to bring flexibility to the spine along with strengthening shoulders. It also relaxes the mind and improves digestion. But, you must practice this pose under the guidance of an expert.
Steps:

- Come down on fours, like a cat, in a way that your back forms the tabletop while your hands and feet form its legs.
- Your arms should be perpendicular to the floor, with your hands under the shoulders.
- Then, look straight.
- While inhaling, raise your chin and push your head back along with raising your tailbone.
- Hold the cat pose for some time.
- Next, while exhaling, drop your chin downwards and arch up your back as much as you can
- Hold the pose for a few seconds and return to the initial table position.
- Practice this pose around 5-6 times.
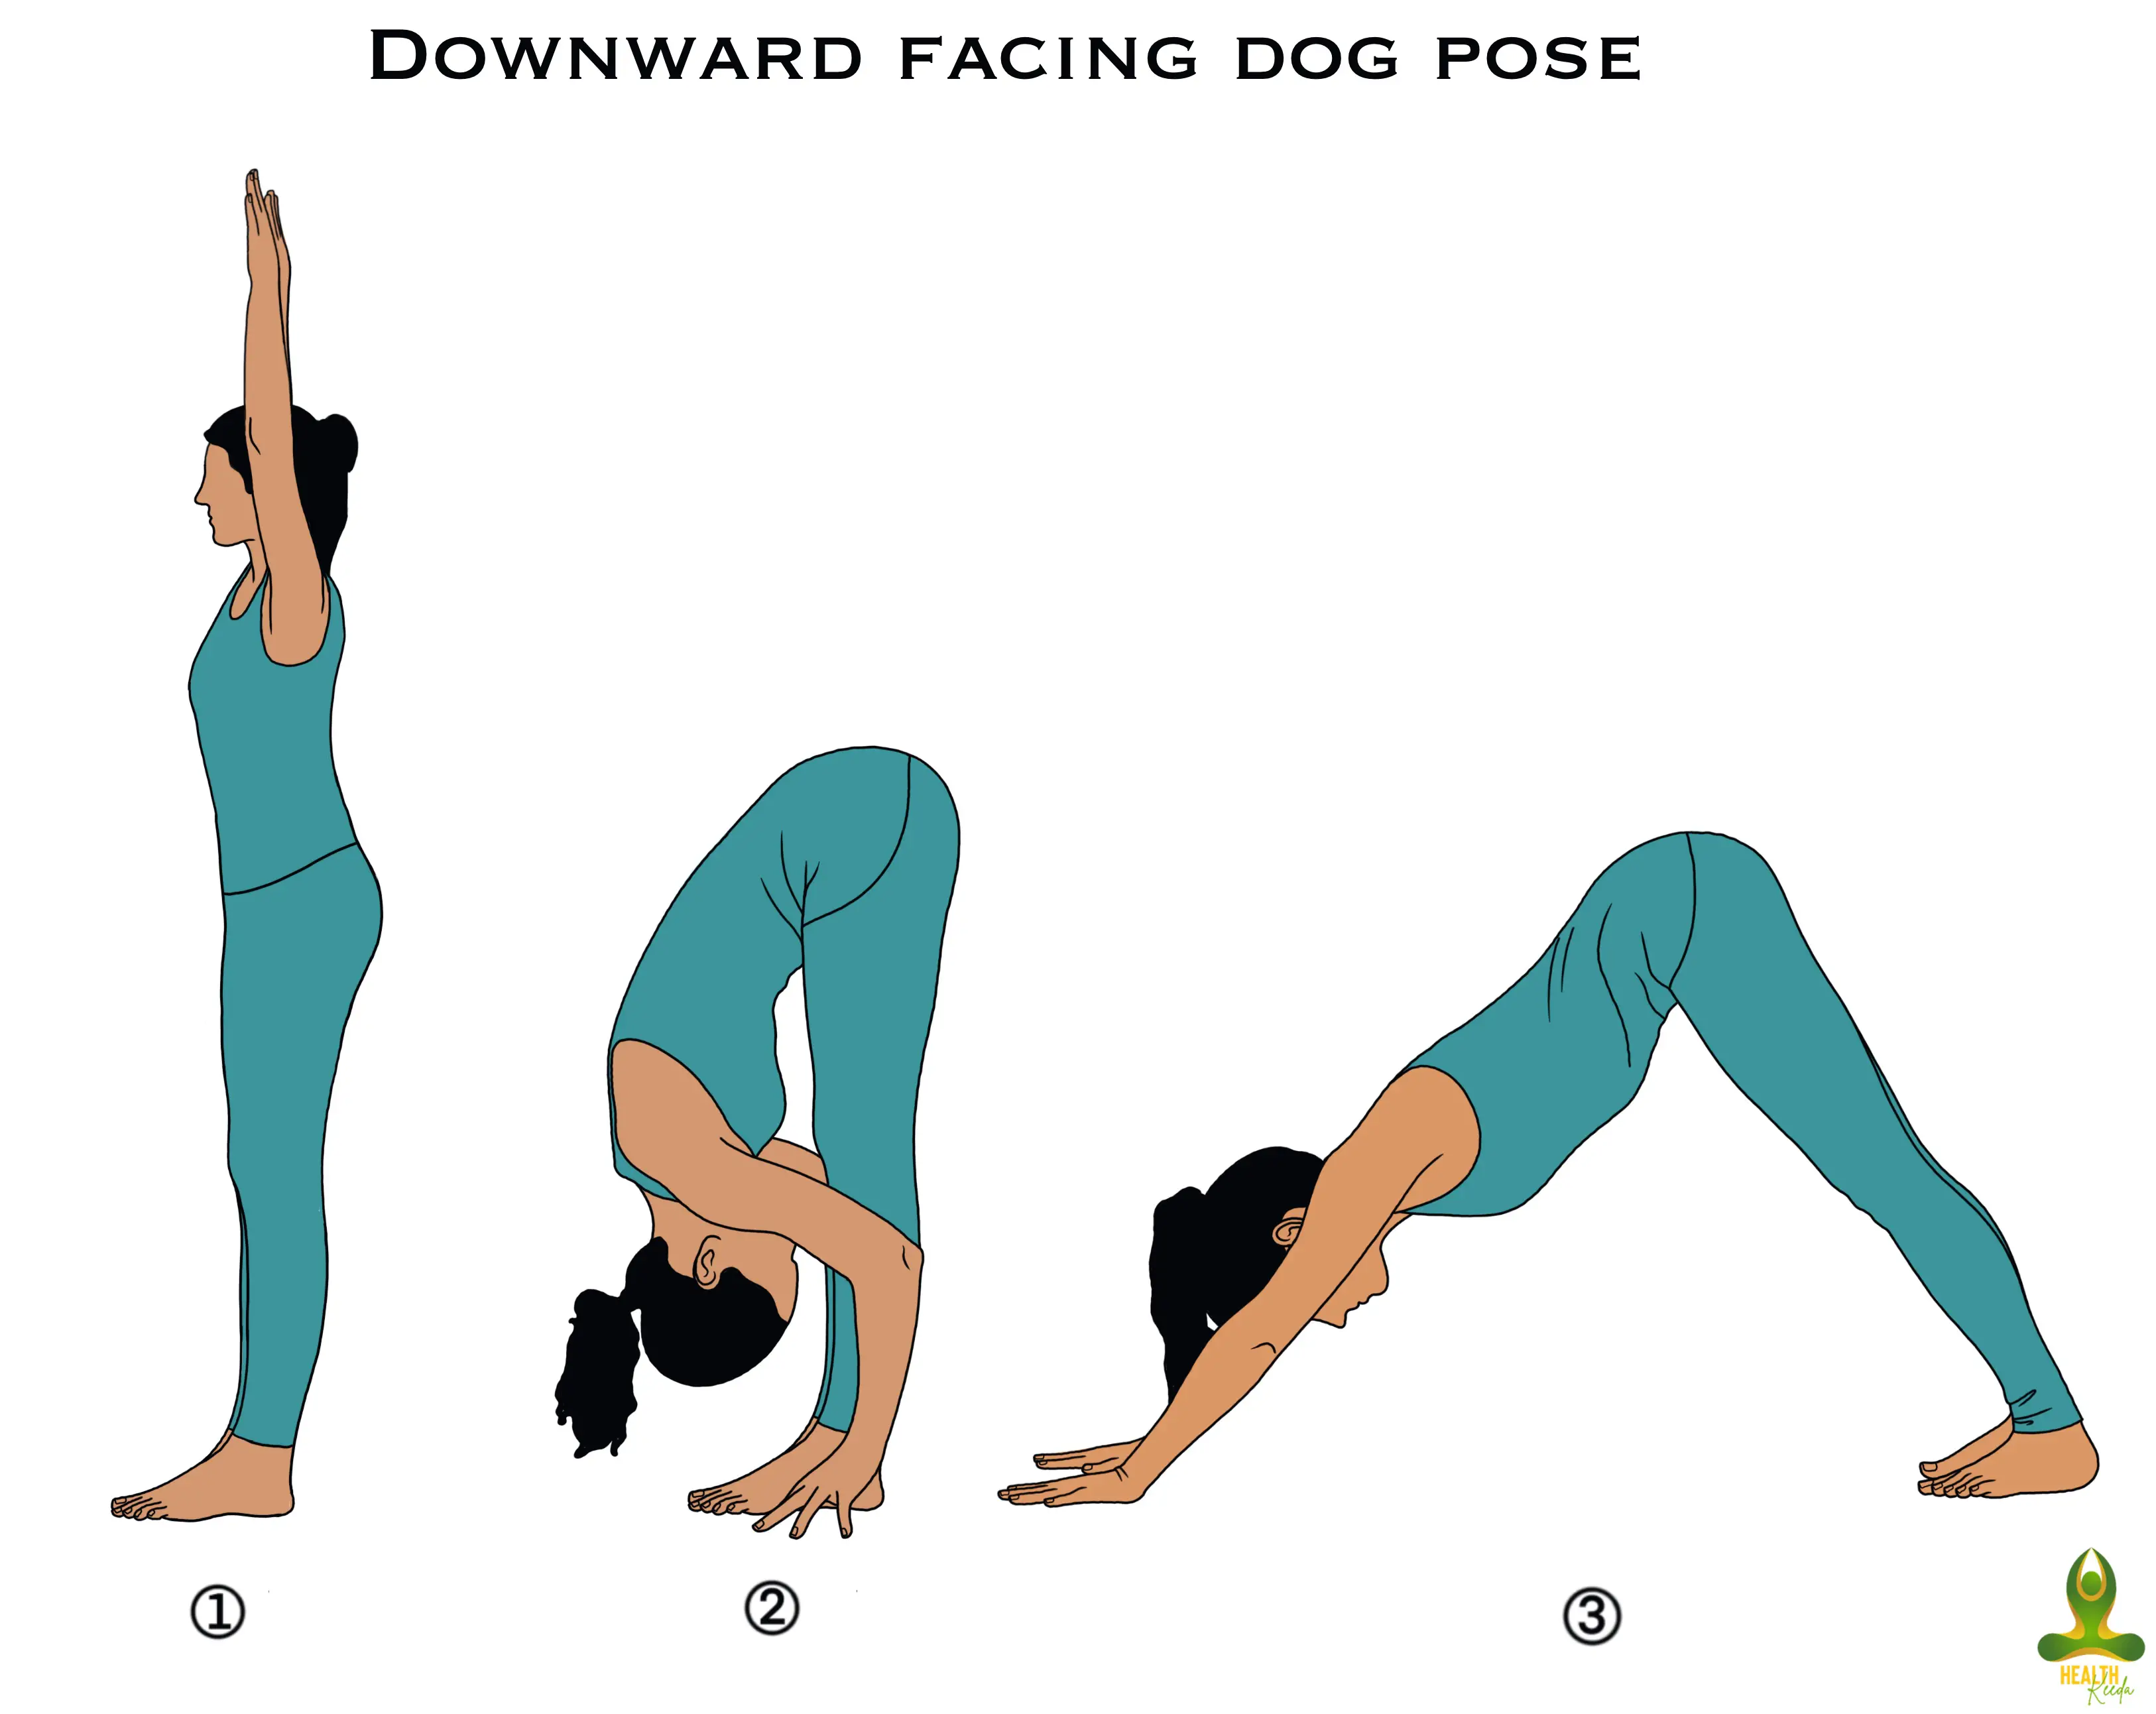
- Adho Mukha Svanasana or Downward-Facing Dog
Downward facing dog is an inversion Asana followed in a sequence of poses. It can be practiced by a beginner and included as a part of daily yoga. This pose lengthens the spine, relieves back pain, and strengthens the shoulders, arms, and legs.
Steps:
- Come on your fours, with your back forming the tabletop and your hands and feet forming the legs of it.
- While exhaling, lift your hips and straighten your arms and legs, forming a V-shape with your body.
- Press your hands to the ground and touch your ears to the inner part of your arms.
- Hold this pose for some time.
- Exhale and come back to the initial table pose.
Recommended Post
- Yoga Asanas to Instant Energy
- Effective Yoga Asanas for Weight Gain
- Effective Yoga Poses to Increase Stamina
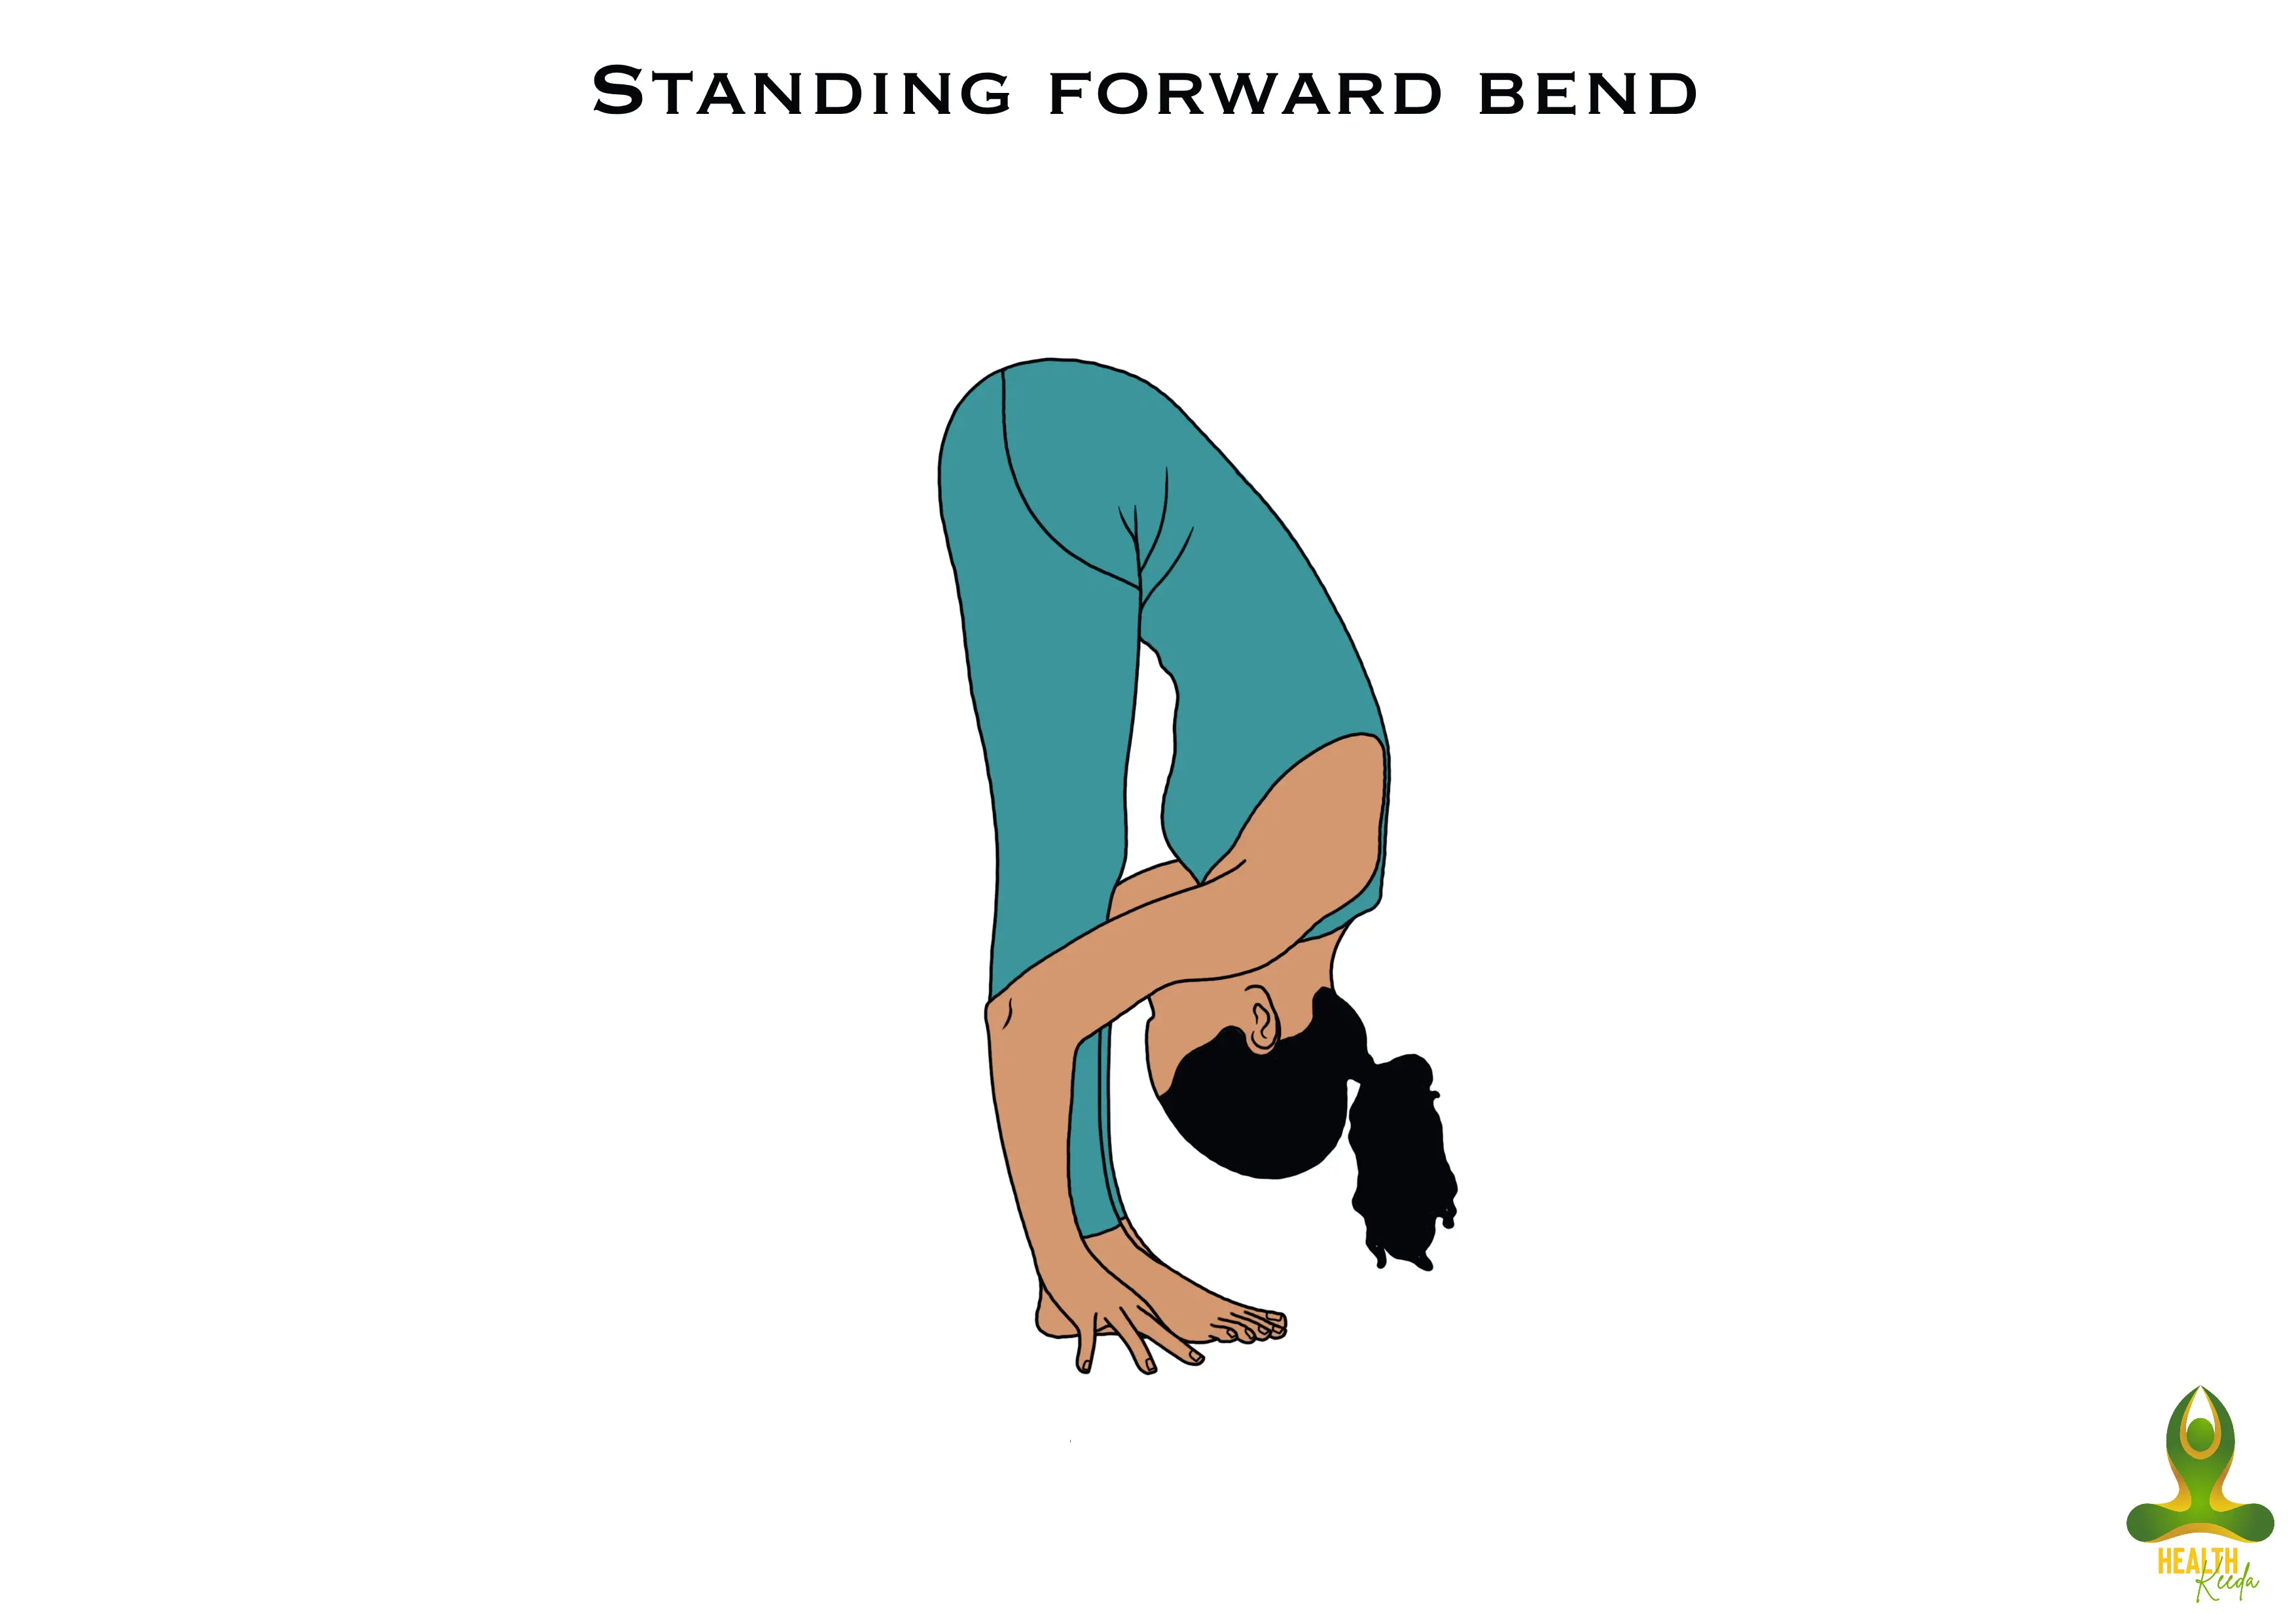
- Uttanasana or Standing Forward Bend
Uttanasana is a full-body stretch pose for counteracting backends. When practiced correctly, this pose helps in relieving back stiffness. In addition, it helps in improving posture, increasing hip flexibility, and is great yoga forback pain and neck pain.
Steps:
- Stand straight with your feet a bit apart. Then, slowly bring your hands above your head, with palms facing each other.
- While bringing your hands front to your heart center, bend forward with your back flat.
- Continue lengthening your spine and bending forward to touch your fingertips to the ground. Next, try to touch your palms to the ground to maximize the stretch.
- Take deep breaths as you release all the tension from your head and neck.
- Slowly come back straight while inhaling.
- Upward-Facing Dog
Upward-facing dog is a back-bending pose known to strengthen the spine and arms. It also stretches the back and relieves back pain. In addition, it improves posture and also stimulates the abdominal organs.
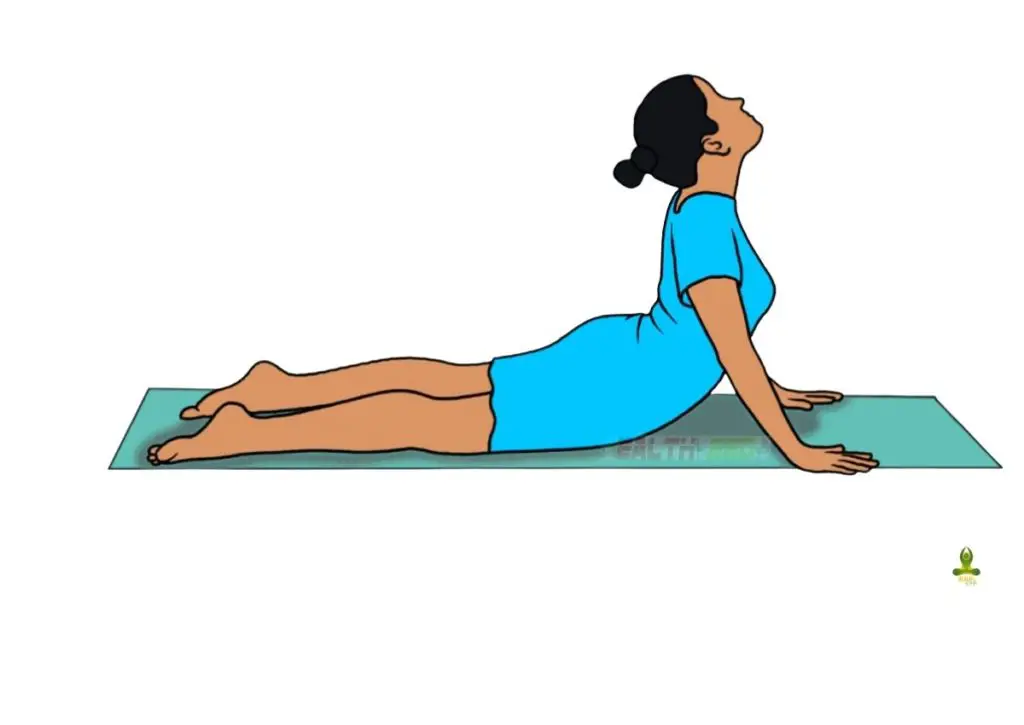
Step:
- Lie down on your belly with the top of your feet facing down.
- Stretch your arms while keeping them sideways.
- Bend your elbows. As you inhale, press your palms to the ground and lift your torso and hips in a way that the entire body weight is on your palms.
- Either keep your head straight or lift it upwards.
- Hold the posture for about 5-10 breaths.
- Slowly, while exhaling, lower your hips, torso, and knees.
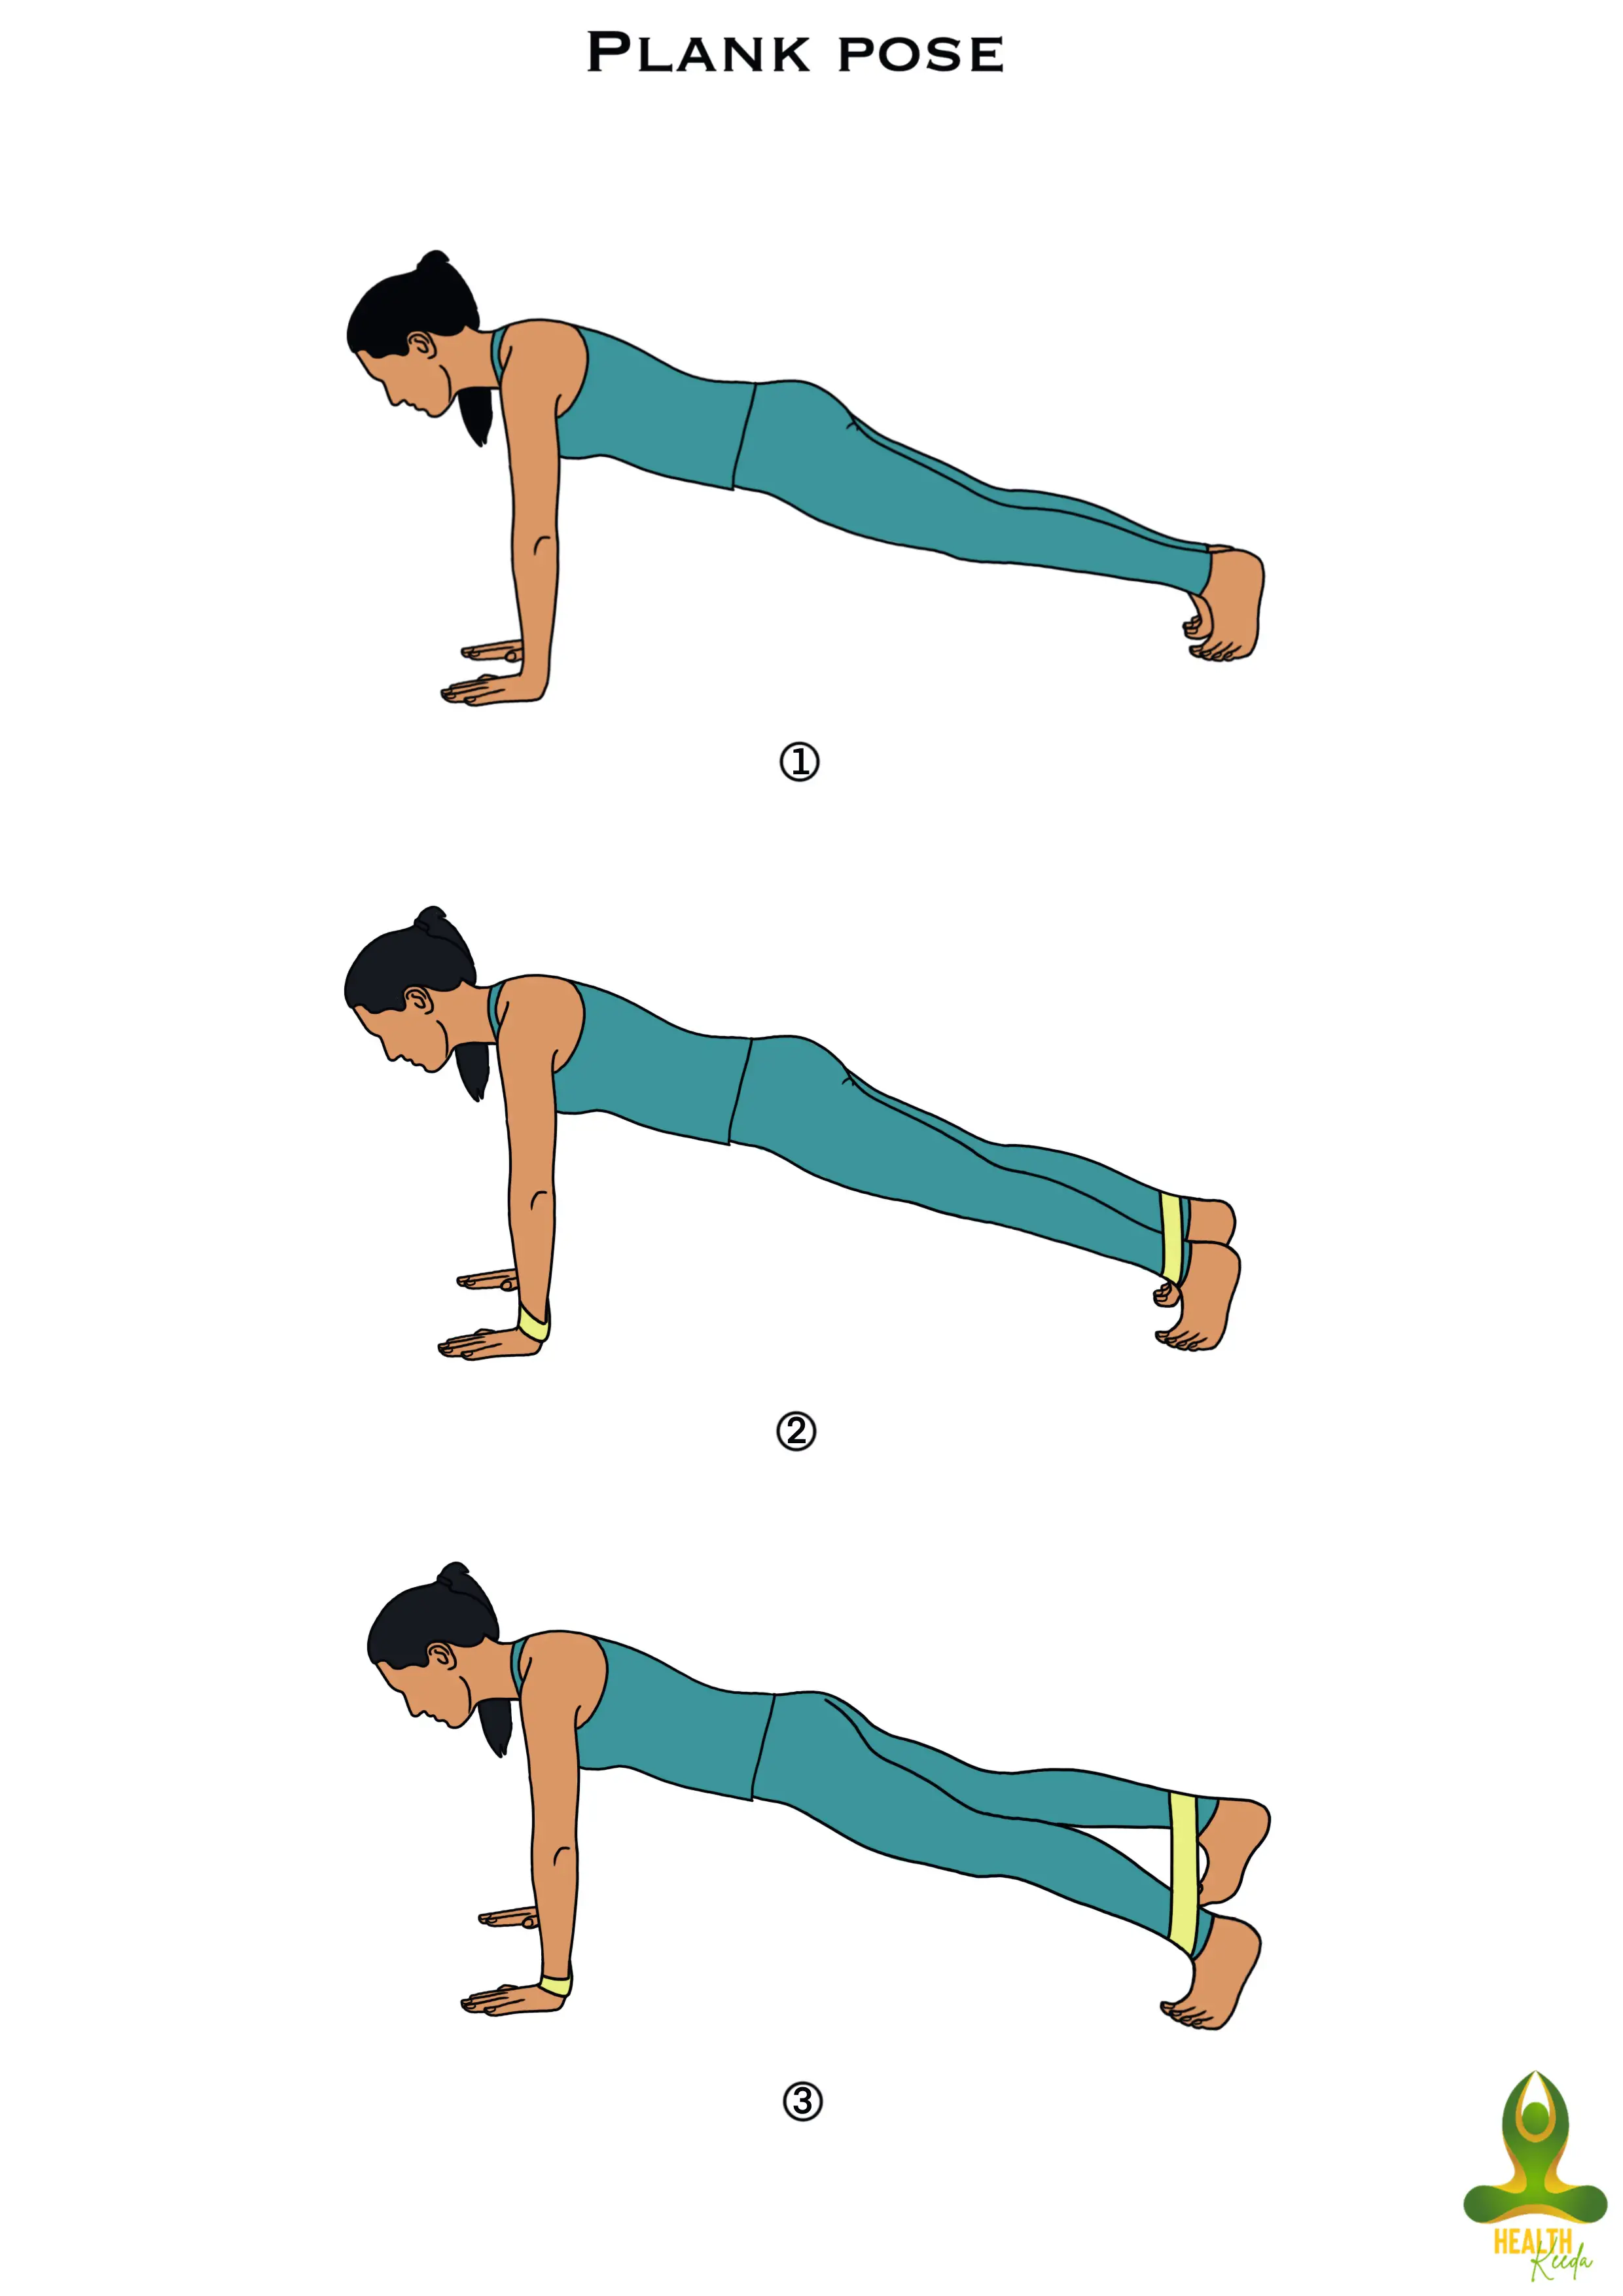
- Plank
The plank pose for beginners is usually known to help build stamina and core strength of the body. It tones all the core muscles, including the abdomen, lower back, and chest, and strengthens the arms, wrist, shoulders, and spine muscles.
Steps:
- Lie down on your belly.
- Keep your arms towards the shoulders with palms facing the ground.
- While inhaling, push your body up in a straight line parallel to the ground. The arms should be perpendicular to the ground and wrists exactly below the shoulders.
- Hold the pose for sometime.
- While exhaling, come back in a sitting posture and relax.
Recommended Post
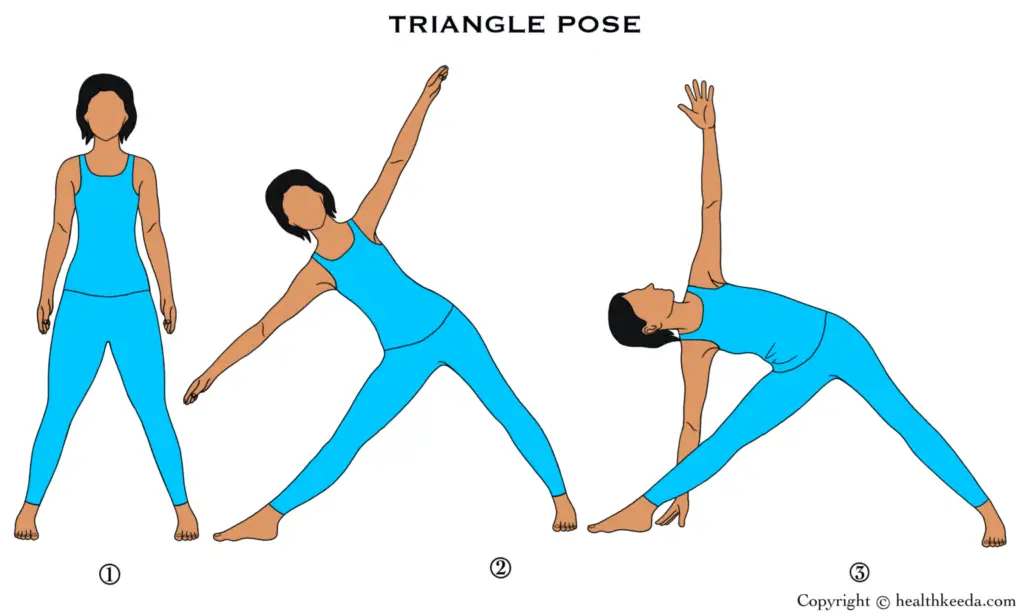
- Trikonasana or Triangle pose
Unlike all other poses, Trikonasana requires you to keep your eyes open to maintain body posture. This pose is well-known for increasing mental and physical equilibrium, improving digestion, and reducing anxiety, stress, and back pain.
Steps:
- Stand straight with your feet wide apart.
- Turn out your right foot by 90 degrees and your left foot by 15 degrees.
- Maintain balance by pressing your feet to the ground.
- While exhaling, bend your body to the right with your waist straight. Bring your left hand in the air and your right hand down to the floor.
- Rest your right hand on your ankle and make sure that your body is bending sideways.
- Stretch as much as you can and relieve all the tension while taking deep breaths.
- Come back while inhaling and repeat the same with the other side.
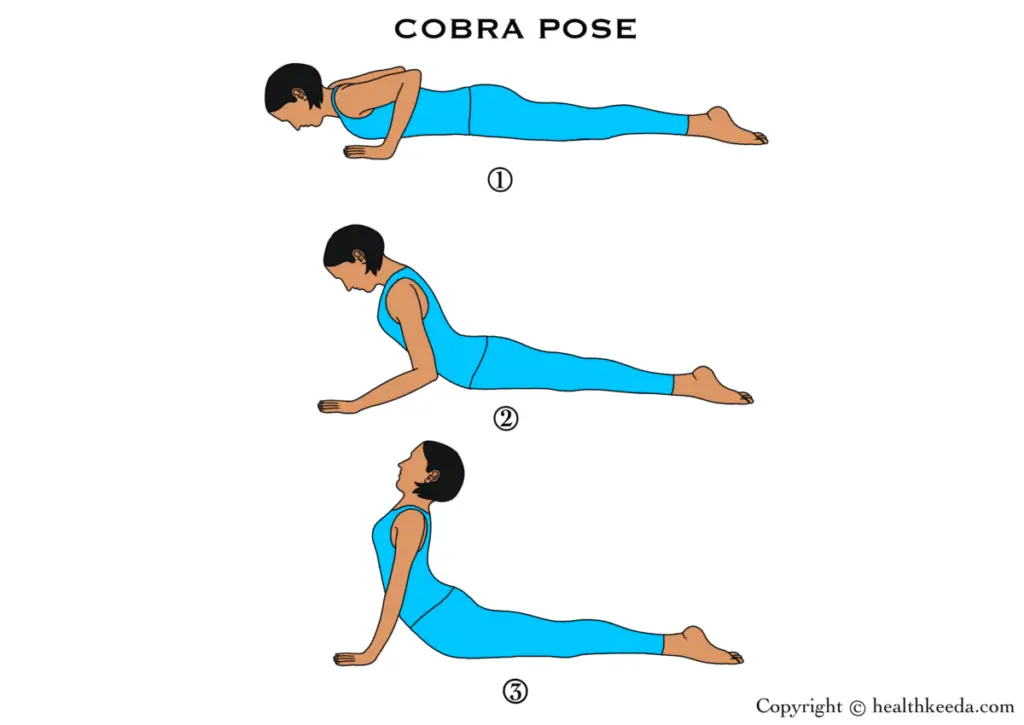
- Bhujangasana
Bhujangasana or the cobra pose is a solution to several problems. First, it is a pose that can be done simply by lying down on your stomach and relieving you of stress. This pose opens up the shoulders and neck to relieve pain, tones the abdomen, strengthens the back, and improves flexibility of the back.
Steps:
- Lie down on your stomach with your soles facing up.
- Keep your legs together and hands under the shoulders with palms touching the ground.
- Slowly lift you your head and chest while inhaling.
- Pull back your torso with the support of your hands.
- Keep breathing and maintain the pose for 4-5 breaths.
- Now, Breathe out and slowly come back and relax. Repeat the pose 4-5 times.4
Recommended Post
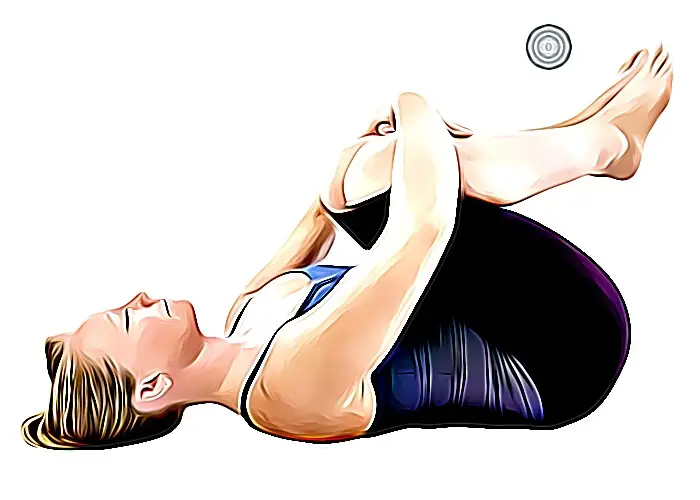
- Pawanmuktasana or Wind-Relieving Pose
Pawanmuktasana is the perfect pose for curing gas and constipation. This pose strengthens the back and abdominal muscles, tones the arm muscles, and massages the intestine and other organs.
Steps:
- Lie down on your back with your feet together.
- While exhaling, bring your right knee towards the chest and press it on your abdomen.
- Lift your head and touch your chin to the right knee.
- Hold the pose while breathing deeply.
- While exhaling, come back and relax and repeat the pose with your left leg.
Although recent research supports yoga as a therapy for back pain relief, it may not be suitable for everyone. Thus, you must consult your doctor before going ahead with any of these poses. However, it will help you assess any possible risks and their progress.
